
WebPal CMS - Editor's Workflow (TEXT)
The process which a content editor using WebPal CMS might follow in a typical editing session can be described as follows:
Step 1: Open WebPal CMS
Begin by opening WebPal CMS. After installation you should have an icon on your desktop which will launch the application.
Once launched you will be prompted to enter your webname. Once you have entered your webname select "Next".
You will now be prompted to select your username and enter your password. Click on the user icon which represents your account, and then enter your password below.
Related Information
Step 2: Select Your Content
You will now be presented with the document tree outlining all the content on your website. By default the entire web is selected, which is noted by a blue hover state over the first icon "Web".
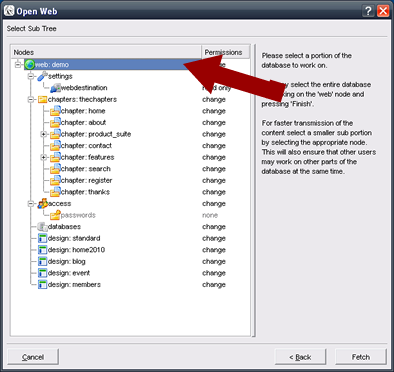
Generally speaking you should avoid selecting the whole web for 2 reasons:
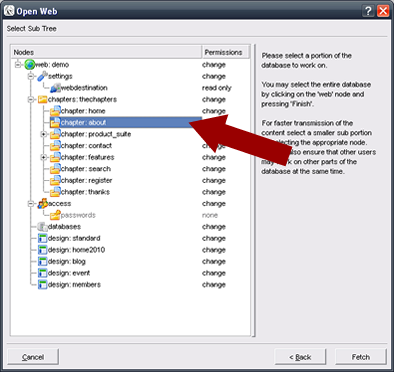
Your best bet is to select one chapter, and its sub-chapters, at a time. After which you can re-open another chapter. Once selected, click "Fetch" in the bottom right hand corner.
Related Information
Step 3: Edit Your Content
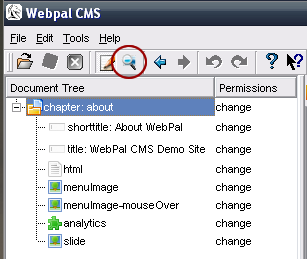
This is where you do all of your content editing. Most of your content editing will happen in an "HTML" node.
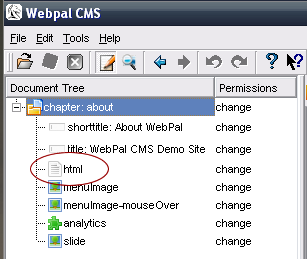
Clicking on an "HTML" node will open up the text editor.
Related Information
Step 4: Save Your Changes
Once you've made changes to your web, the save button will become available to you.
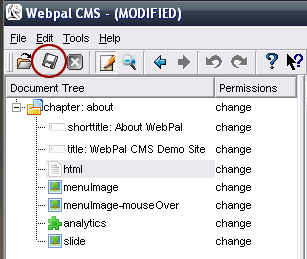
Clicking on the save button will save your work back to the WebPal server. You will see two progress bars in the bottom right hand corner giving you feedback.
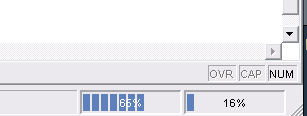
Once both progress bars have reached 100%, your changes have been saved. Note that your website has not yet been updated, you have simply saved your work. At this point you can continue editing or move to Step 5, previewing your changes.
Step 5: Do A Preview
To begin a preview you will need to select the "Preview/Publish" toggle from the main menu.
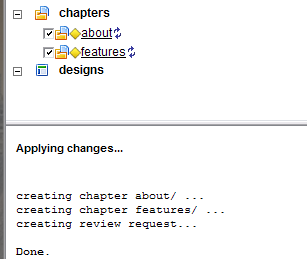
This will shut-down "Edit Content" mode and move you to a new screen where you can preview (and eventually publish) your changes. First you will need to locate the content you've changed. This will be marked with a red triangle. Place a check mark in the box beside your changed content.
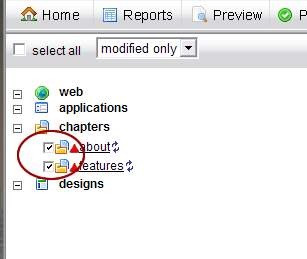
Now, simply click on the "Preview" button above. In the area below the document tree you will see some status dialogue going on while the review takes place. Once complete it will say done, and a review request will be generated on the right-most portion of the screen.
Step 6: Check Your Changes Online
To see how your changes look open up your favourite browser and go to your staging site. Note that this URL will never change, and will always take the following syntax:
http://webpal.net/1.6/yourwebname/web
You will need to replace "yourwebname" with the name of the web you entered in Step 1.
This is a complete copy of your website and will show you all Previewed (READ: Not published) changes that have been made by yourself and your peers.
Step 7: Publish Live
If you are satisfied with your changes you can simply place checkmarks beside those pages you would like to publish and select the "Publish" button located to the right of "Preview".
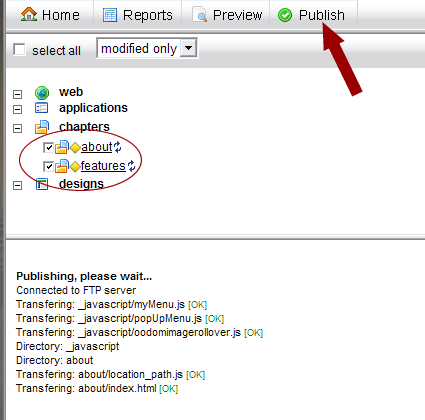
Once again you will be presented with status dialogue below the document tree, and once complete, you will see "Publish Done" along with a Publish Report on the right hand side of the screen.
Alternatively, you can toggle back to "Edit Content" mode (See below) and go back to Step 3.
-
- By selecting the whole web you have "locked it out" from all other users. This means no one else can make edits to your site other than you.
- For larger websites, fetching the whole web will slow down the saving process.