
Sharing a file
Learn how to share your documents with authiorized personnel or the general public. This feature is available only to those users with read & write permissions.
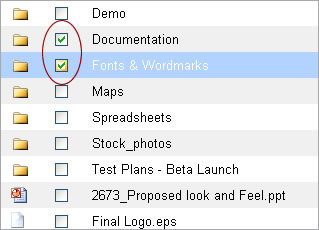
Step 1
Click the checkbox to the left of the name of the files(s) and/or folder(s) you want to share. (You can delete multiple files and folders at the same time.)
Step 2
Over over the "Share" button in the action menu at the bottom of the screen to reveal the popup options.
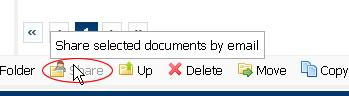
Step 3
Select the popup "Share selected documents by email"
Step 4
On the notification screen you are presented with a number of areas:
Documents added to folder /my folder name
This is simply a list of all the documents that you've added. You could in fact have used the "Add Another" button first, then added a number of files, then used the "Send Notification" button which would now list all the files you've added.
Subject
This is the subject line of the email that will be sent to the users being notified.
Message
This is the message that will be included in the body of the email sent to the users being notified.
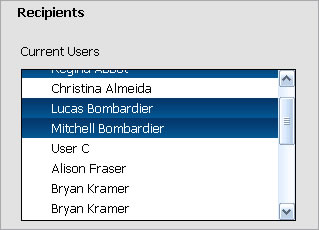
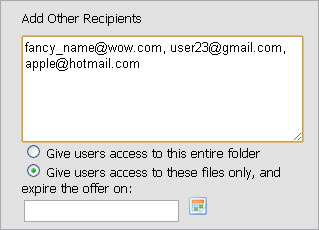
Recipients
This area has two distinct ways of adding recipients. The first is to choose amongst the members of the group you have been assigned to. User ctrl+click to add multiple.
You can also add other recipients who are not currently users of your document manager. You can add multiple addresses by using a comma between addresses. You can also specify a date to which this invitation expires by using the calendar icon at the bottom.
When you're ready click the send button and you're done!